Tutorial 1: Your first Python Rapture Project
Objectives:
- Use of the RIM user interface to interact with Rapture managed data
- Use of a client-side python script app to highlight the Rapture API
This will cover the following steps:
- Uploading a CSV file to a blob repo in your RIM instance
- Translating raw CSV data files into document data type
- Creating a series using document created in step #2
- Running a graph based report from series data in step #3 and saving as blob pdf
For the purposes of this tutorial:
- A python script is provided to allow you to exercise code and see the output in cmd line and follow along in the RIM user interface
- It is recommended to also look at the source code
- In this tutorial mac conventions are used for command line work
Before beginning this demonstration of Rapture it is expected that your environment satisfies the following pre-requisites
- Java 8 (or later) runtime is installed and accessible
- Python 2.7.10 (or later) is installed with the following python modules installed:
- requests (https://pypi.python.org/pypi/requests)
- numpy (https://pypi.python.org/pypi/numpy)
1. Create new Repos for use in this Tutorial
The first step in this tutorial is to login to your RIM instance and create the data repositories.
Process | |
|---|---|
Login to your demo environment using url and credentials provided during signup | |
Create a Document repository using RIM's + Add Repositories interface:
| 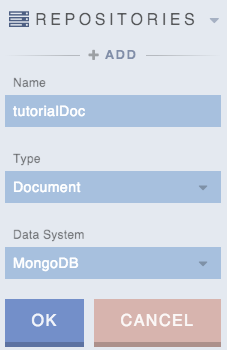 |
Create a Blob repository again using RIM's + Add Repositories interface:
| 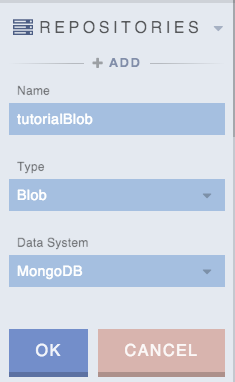 |
| With the two repositories in place we are ready to move onto the next step in the tutorial: upload a CSV file. | |
If you'd like to see how to create repositories via Rapture Information Manager's UI, follow this process. If you wish to skip this, the repo creation will be handled by our tutorial code.
Create Repos
To Add a repo simply select "+ ADD" under REPOSITORIES.
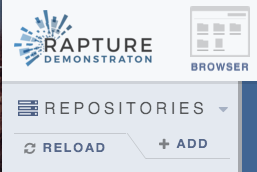
2. Capture Data – Load a CSV
In folder $RAPTURE_HOME/Intro01/Python/src/main python script App.py:
$ python App.py -s UPLOAD -p <password>
Under the Hood
This is the first step in the python Tutorial Intro01. All steps use the global login "rapture" from the "loginToRapture" function seen here:
def loginToRapture(url, username, password):

        	global rapture

        	rapture = raptureAPI.raptureAPI(url, username, password)

        	if 'valid' in rapture.context and rapture.context['valid']:

        	    print 'Logged in successfully ' + url

        	else:

        		print "Login unsuccessful"
- The csv file is read from the file location (provided by argument or environment variable).
Next, we create a URI, repo config, and meta config for the blob repository we intend so upload our CSV file to:
# Create blob repo

        	blobRepoUri = "//tutorialBlob"

        	rawCsvUri = blobRepoUri + "/introDataInbound.csv"

        	config = "BLOB {} USING MONGODB {prefix=\"tutorialBlob\"}"

        	metaConfig = "REP {} USING MEMORY {prefix=\"tutorialBlob\"}"
This: BLOB {} USING MONGODB {prefix=\"tutorialBlob\"} this config declares the repo as a BLOB repo, using MongoDB (when supplied, other back-ends can be used such as Cassandra or Redis), with a MongoDB prefix of "tutorialBlob". The meta data config uses a non-versioned document repository ("REP") using system memory, with the same prefix.
We check if the repository may already exist, clean it out if it does, then (re-)create it:
if(rapture.doBlob_BlobRepoExists(blobRepoUri)):

        		print "Repo exists, cleaning & remaking"

        		rapture.doBlob_DeleteBlobRepo(blobRepoUri)

        	rapture.doBlob_CreateBlobRepo(blobRepoUri, config, metaConfig)
To finally upload the CSV to the BLOB repo we just created, we encode the raw .csv data using base64, and upload to the rawCsvUri with the description of "text/csv":
   # Encode and Store Blob

        	print "Uploading CSV"

        	encoded_blob = base64.b64encode(str(rawFileData))

        	rapture.doBlob_PutBlob(rawCsvUri, encoded_blob, "text/csv")
At this point we have uploaded the CSV file into the blob://tutorialBlob repository.
Look at the UPLOAD Function() in the RaptureTutorials project to see the API calls used.
Look at the RIM interface to see the blob you uploaded:
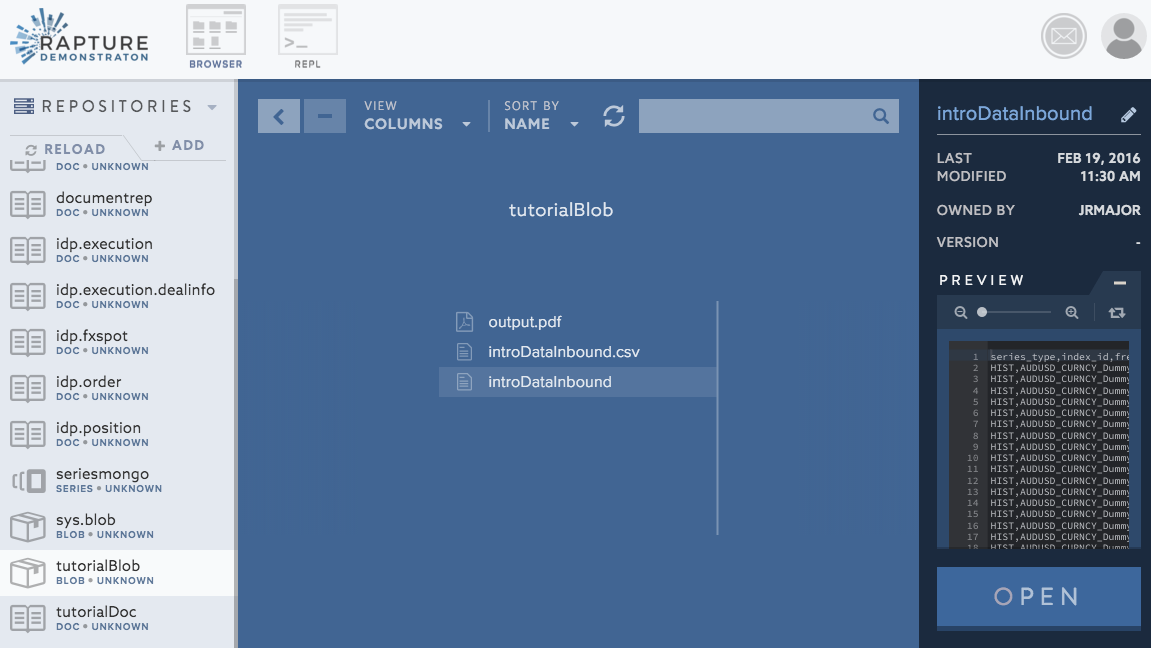
Next up we will run code to translate the CSV file (in the blob repo) to a document (in the document repo).
In this step
Run upload script to load CSV into Blob
View Blob
Windows users
Use %RAPTURE_HOME% if needed
3. Translate Data – Create documents from raw Data
In folder $RAPTURE_HOME/Intro01/Python/src/main python script App.py:
$ python App.py -s BLOBTODOC -p <password>
Under the Hood
- First thing we do in this step is to check if the CSV data has already been uploaded to the BLOB (done in UPLOAD step).
We then retrieve that data, and decode with base64 (recall we encoded it with base64 before uploading). We then transform the raw CSV data into a list of lists, with each list being a "row" in the CSV data & the very first one containing the keys (ex: frequency):
		# Pull encoded blob out of rapture

        	 	encoded_blob = rapture.doBlob_GetBlob(blobUri)['content']

        		# Decode blob using base64 python library

        		blob_string = base64.b64decode(str(encoded_blob))

        		# Add list identifiers to string so that we can convert to python list

        		blob_string = "[[\"" + blob_string.replace(',', "\",\"").replace('\n', "\"],[\"") + "\"]]"

        		# Convert string to python list

        		rows = ast.literal_eval(blob_string)
We then create a versioned document repository ("NREP") using MONGODB with a prefix of "tutorialDoc" by creating a configuration string to pass to the CreateDocRepo API call. The same check here is done as in the UPLOAD step to clean the repository out if it already exists:
		# Create doc repo

        		docRepoUri = "//tutorialDoc"

        		docUri = docRepoUri + "/introDataTranslated"

        		config = "NREP {} USING MONGODB {prefix=\"tutorialDoc\"}"

        		if(rapture.doDoc_DocRepoExists(docRepoUri)):

        			rapture.doDoc_DeleteDocRepo(docRepoUri)

        		rapture.doDoc_CreateDocRepo(docRepoUri, config)
The next block of code is the guts of the transformation of data from the list of lists into a flattened JSON structure using Python dictionaries. The structure goes as follows:
{Provider: <provider>,{series_type: <series_type>}, {frequency: <frequency>}, {index_id:{<index_id>:{<price_type>:{<date>:<index_price>}}}Once we have the data structured the way we want it, we then make a Rapture API call to put it into our document repository we just created. Note that since we are in python, we must use "json.dumps" to convert the dictionary to a JSON object. Since an orderedDict was used to format the order the data appears, we set "sort_keys" to "False" to preserve the order.
		#PUT THE CSV DATA RETRIEVED FROM A BLOB & TRANSLATED INTO THE DOCUMENT REPOSITORY
        		rapture.doDoc_PutDoc(docUri, json.dumps(Order, sort_keys=False))
At this point the CSV (blob) data has been converted into a document type, which is in this repository: document://tutorialDoc/introDataTranslated
Look at the BLOBTODOC Function() in the RaptureTutorials project to see the API calls used.
Look at the RIM interface to see the document you created.
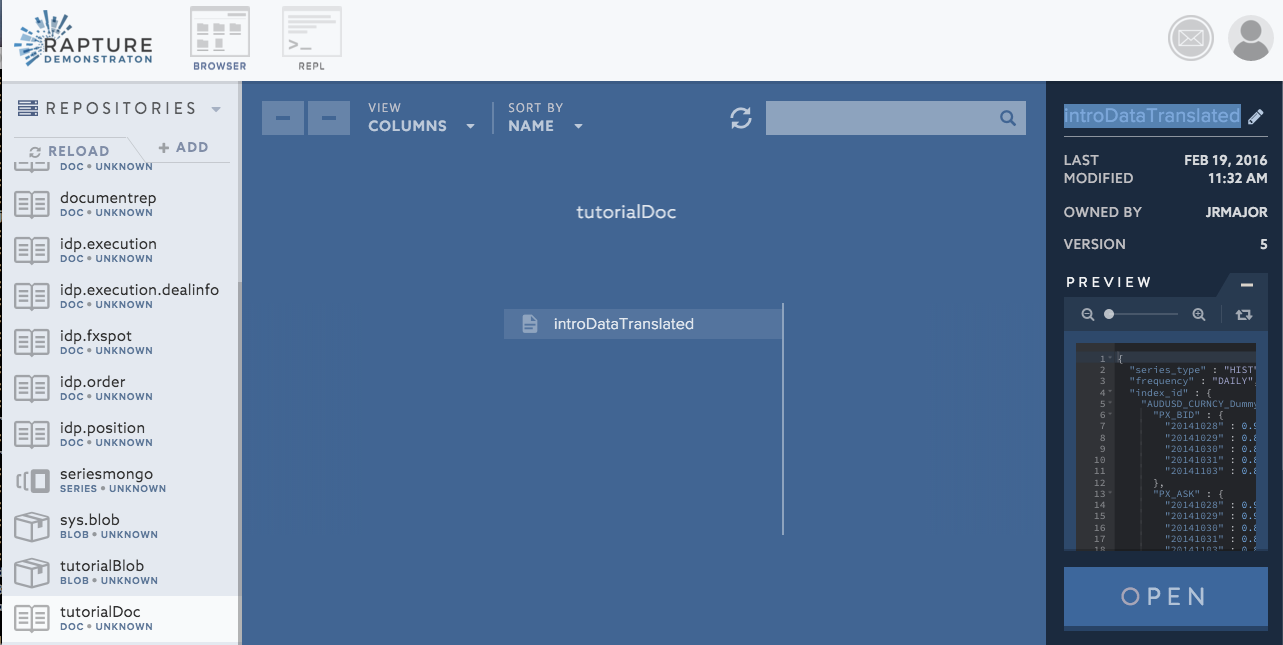
Next up we will look at creating series data from the document.
In this step
Run translate script to create Doc
View Doc
Windows users
Use %RAPTURE_HOME% if needed
4. Analyze Data – Update series Data from documents
In folder $RAPTURE_HOME/Intro01/Python/src/main python script App.py:
$ python App.py -s DOCTOSERIES -p <password>
Under the Hood
- The first thing we do in this step is to check that the document repository containing the JSON data exists (we created it in the last step: BLOBTODOC)
We then retrieve & convert the document content (JSON) back into a python dictionary:
# Convert json string to a python dict object doc = ast.literal_eval(rapture.doDoc_GetDoc(docUri))- We then check if the //datacapture series repo has already been created (It should have came pre-installed on your demo environment)
Next is the code block for generating a series URI for each price type. An Example URI would be:
//datacapture/HIST/Provider_1a/AUDUSD_CURNCY_Dummy/DAILY/PX_BID
The loop in this script generates disposable base URI's and is able to insert the data from our dictionary into the correct respective series URI's.
The API call to insert the data into a series is:# Store each date and price in the appropriate series rapture.doSeries_AddDoubleToSeries(seriesUri, date, float(price))
At this point a a series has been created using data from document://tutorialDoc/introDataTranslated.
Look at the DOCTOSERIES Function() in the RaptureTutorials project to see the API calls used.
Your data has now been stored in Rapture Information Manager in three forms: raw CSV, JSON document, and series data.
You can view the series on the RIM web interface.
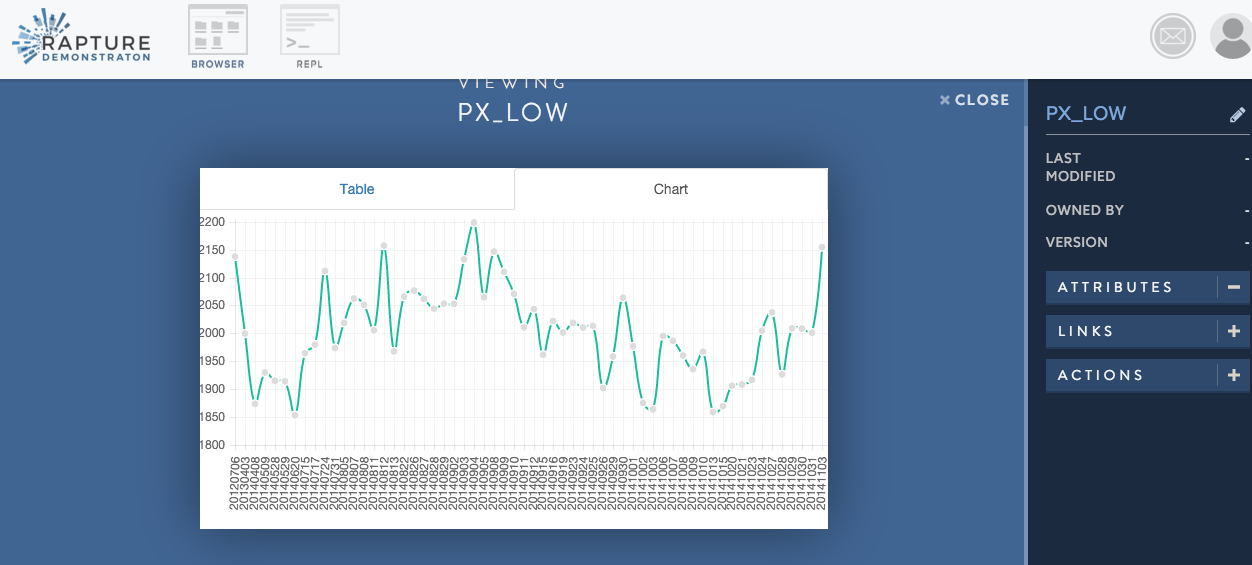
Next we will create a pdf from the series repository.
In this step
Run analyze script to create/update Series
View Series
Windows users
Use %RAPTURE_HOME% if needed
5. Distribute Data – create reports from series Data
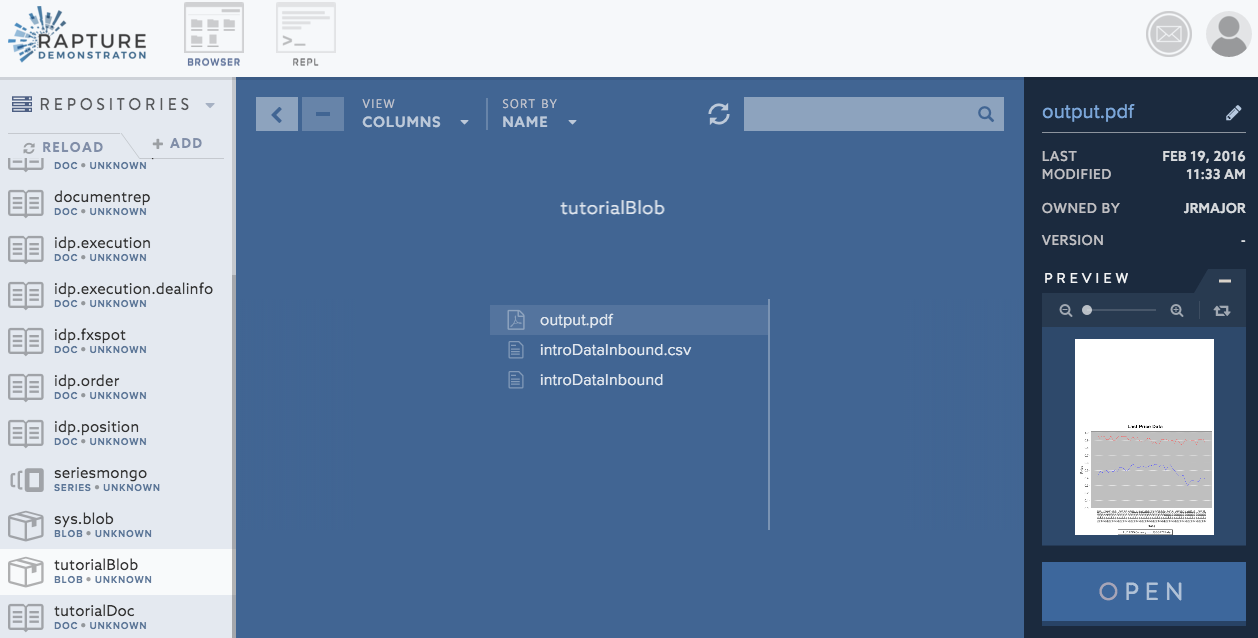
This step will produce a pdf from the series data. The pdf is saved to your local directory and also the Rapture Instance.
$ cd $RAPTURE_HOME/Intro01/Java/ReportApp/build/install/ReportApp/bin
$ ./ReportApp
Look at the ReportApp code in RaptureTutorials project.
You can look at the pdf on the RIM interface at this url blob://tutorialBlob/output.pdf
6. Reset Data (Optional)
Reset data
Follow these steps to reset your demo environment.
- Using RIM, go to Scripts/Tutorial01/tutorialCleanup.rfx and click open.
- Execute the script using the "Run Script" button